In this article, I will be presenting simple PHP & MySQL code to add, edit, delete and view data. This kind of system is also referred to CRUD (Create, Read, Update, Delete).
Here is a step-by-step guide on creating a CRUD system using PHP & MySQL:
First of all, we will create a new MySQL database. Let us name the database as ‘test‘.
CREATE DATABASE test;
Then, we will create a new table in database ‘test’. Let us name the table as ‘users‘.
use test;

CREATE TABLE `users` (
  `id` int(11) NOT NULL auto_increment,
  `name` varchar(100) NOT NULL,
  `age` int(3) NOT NULL,
  `email` varchar(100) NOT NULL,
  PRIMARY KEY  (`id`)
);
Now, we will create a config.php file which contains database connection code. This code connects to the MySQL database. This file is included in all PHP pages where database connection is necessary.
dbConnection.php
In below code, the database host name is localhost where username=root and password=root. The database test has been selected.
<?php
$databaseHost = 'localhost';
$databaseName = 'test';
$databaseUsername = 'root';
$databasePassword = 'root';

// Open a new connection to the MySQL server
$mysqli = mysqli_connect($databaseHost, $databaseUsername, $databasePassword, $databaseName);
`
To add data to the database, we need an html form.
add.php
<html>
<head>
	<title>Add Data</title>
</head>

<body>
	<h2>Add Data</h2>
	<p>
		<a href="index.php">Home</a>
	</p>

	<form action="addAction.php" method="post" name="add">
		<table width="25%" border="0">
			<tr>
				<td>Name</td>
				<td><input type="text" name="name"></td>
			</tr>
			<tr>
				<td>Age</td>
				<td><input type="text" name="age"></td>
			</tr>
			<tr>
				<td>Email</td>
				<td><input type="text" name="email"></td>
			</tr>
			<tr>
				<td></td>
				<td><input type="submit" name="submit" value="Add"></td>
			</tr>
		</table>
	</form>
</body>
</html>
Form action on add.php is addAction.php. It means that the submitted form data will go to addAction.php.
In addAction.php, we do a simple validation of checking if the entered name, email & age are empty or not. If they are all filled then the data will be inserted into database table.
addAction.php
<html>
<head>
	<title>Add Data</title>
</head>

<body>
<?php
// Include the database connection file
require_once("dbConnection.php");

if (isset($_POST['submit'])) {
	// Escape special characters in string for use in SQL statement
	$name = mysqli_real_escape_string($mysqli, $_POST['name']);
	$age = mysqli_real_escape_string($mysqli, $_POST['age']);
	$email = mysqli_real_escape_string($mysqli, $_POST['email']);

	// Check for empty fields
	if (empty($name) || empty($age) || empty($email)) {
		if (empty($name)) {
			echo "<font color='red'>Name field is empty.</font><br/>";
		}

		if (empty($age)) {
			echo "<font color='red'>Age field is empty.</font><br/>";
		}

		if (empty($email)) {
			echo "<font color='red'>Email field is empty.</font><br/>";
		}

		// Show link to the previous page
		echo "<br/><a href='javascript:self.history.back();'>Go Back</a>";
	} else {
		// If all the fields are filled (not empty)

		// Insert data into database
		$result = mysqli_query($mysqli, "INSERT INTO users (`name`, `age`, `email`) VALUES ('$name', '$age', '$email')");

		// Display success message
		echo "<p><font color='green'>Data added successfully!</p>";
		echo "<a href='index.php'>View Result</a>";
	}
}
?>
</body>
</html>
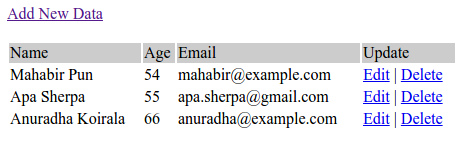
Data from database is fetched and displayed in index.php file. This is our homepage. This file also contains a link to add data. On every row of displayed data, there is also a link to edit and delete data. Below is a sample image of our homepage:
index.php
<?php
// Include the database connection file
require_once("dbConnection.php");

// Fetch data in descending order (lastest entry first)
$result = mysqli_query($mysqli, "SELECT * FROM users ORDER BY id DESC");
?>

<html>
<head>
	<title>Homepage</title>
</head>

<body>
	<h2>Homepage</h2>
	<p>
		<a href="add.php">Add New Data</a>
	</p>
	<table width='80%' border=0>
		<tr bgcolor='#DDDDDD'>
			<td><strong>Name</strong></td>
			<td><strong>Age</strong></td>
			<td><strong>Email</strong></td>
			<td><strong>Action</strong></td>
		</tr>
		<?php
		// Fetch the next row of a result set as an associative array
		while ($res = mysqli_fetch_assoc($result)) {
			echo "<tr>";
			echo "<td>".$res['name']."</td>";
			echo "<td>".$res['age']."</td>";
			echo "<td>".$res['email']."</td>";
			echo "<td><a href=\"edit.php?id=$res[id]\">Edit</a> |
			<a href=\"delete.php?id=$res[id]\" onClick=\"return confirm('Are you sure you want to delete?')\">Delete</a></td>";
		}
		?>
	</table>
</body>
</html>
Each row of data can be edited separately. Row ID is passed in the URL of edit.php. ID uniquely identifies the data entry.
The action of the form in edit.php is editAction.php. It means that the submitted form data will go to editAction.php.
In edit.php, a single row entry of data is fetched based on the id. The fetched data is displayed in the edit form. When user edits the data and submits the form, the submitted form data goes to editAction.php.
edit.php
<?php
// Include the database connection file
require_once("dbConnection.php");

// Get id from URL parameter
$id = $_GET['id'];

// Select data associated with this particular id
$result = mysqli_query($mysqli, "SELECT * FROM users WHERE id = $id");

// Fetch the next row of a result set as an associative array
$resultData = mysqli_fetch_assoc($result);

$name = $resultData['name'];
$age = $resultData['age'];
$email = $resultData['email'];
?>
<html>
<head>
	<title>Edit Data</title>
</head>

<body>
    <h2>Edit Data</h2>
    <p>
	    <a href="index.php">Home</a>
    </p>

	<form name="edit" method="post" action="editAction.php">
		<table border="0">
			<tr>
				<td>Name</td>
				<td><input type="text" name="name" value="<?php echo $name; ?>"></td>
			</tr>
			<tr>
				<td>Age</td>
				<td><input type="text" name="age" value="<?php echo $age; ?>"></td>
			</tr>
			<tr>
				<td>Email</td>
				<td><input type="text" name="email" value="<?php echo $email; ?>"></td>
			</tr>
			<tr>
				<td><input type="hidden" name="id" value=<?php echo $id; ?>></td>
				<td><input type="submit" name="update" value="Update"></td>
			</tr>
		</table>
	</form>
</body>
</html>
In editAction.php some simple validation is done for empty data. When everything is correct, then that particular entry of data is updated in the database.
editAction.php
<?php
// Include the database connection file
require_once("dbConnection.php");

if (isset($_POST['update'])) {
	// Escape special characters in a string for use in an SQL statement
	$id = mysqli_real_escape_string($mysqli, $_POST['id']);
	$name = mysqli_real_escape_string($mysqli, $_POST['name']);
	$age = mysqli_real_escape_string($mysqli, $_POST['age']);
	$email = mysqli_real_escape_string($mysqli, $_POST['email']);

	// Check for empty fields
	if (empty($name) || empty($age) || empty($email)) {
		if (empty($name)) {
			echo "<font color='red'>Name field is empty.</font><br/>";
		}

		if (empty($age)) {
			echo "<font color='red'>Age field is empty.</font><br/>";
		}

		if (empty($email)) {
			echo "<font color='red'>Email field is empty.</font><br/>";
		}
	} else {
		// Update the database table
		$result = mysqli_query($mysqli, "UPDATE users SET `name` = '$name', `age` = '$age', `email` = '$email' WHERE `id` = $id");

		// Display success message
		echo "<p><font color='green'>Data updated successfully!</p>";
		echo "<a href='index.php'>View Result</a>";
	}
}
Each row of data can be deleted separately. Row ID is passed in the URL of delete.php. ID uniquely identifies the data entry. After deletion, the user is redirected to homepage (index.php).
delete.php
<?php
// Include the database connection file
require_once("dbConnection.php");

// Get id parameter value from URL
$id = $_GET['id'];

// Delete row from the database table
$result = mysqli_query($mysqli, "DELETE FROM users WHERE id = $id");

// Redirect to the main display page (index.php in our case)
header("Location:index.php");
`
Download Full Source Code: Simple Create, Read, Update, Delete in PHP & MySQL
Hope this helps. Thanks.